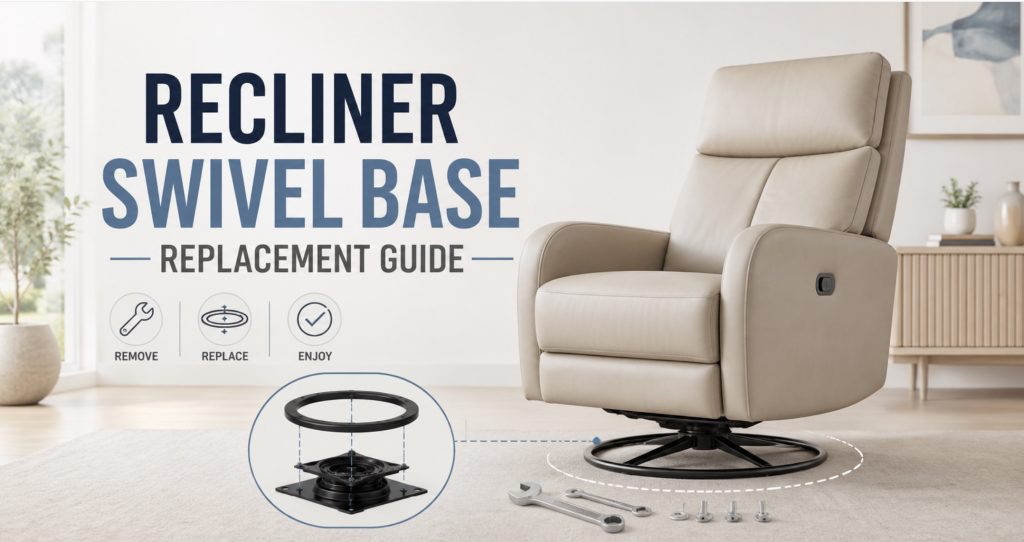
A worn swivel base can make a recliner wobble, squeak, lean, drag, or feel unsafe when you turn. The good news is that many swivel bases, ring plates, bearings, and mounting hardware can be replaced if you measure carefully and match the bolt pattern before ordering.
- Signs Your Recliner Swivel Base Needs Replacement
- What to Check Before Buying a New Swivel Base
- Types of Recliner Swivel Bases
- How to Measure a Recliner Swivel Base
- How to Remove the Old Swivel Base
- How to Install the Replacement Swivel Base
- Common Problems During Replacement
- Helpful Parts and Product Searches
- Tools You May Need
- Safety Tips Before and After Replacement
- Maintenance Tips for Swivel Recliners
- Frequently Asked Questions
Signs Your Recliner Swivel Base Needs Replacement
A recliner swivel base does more than let the chair turn. It supports the chair, keeps the frame level, and allows smooth rotation without scraping, rocking, or shifting. When the base wears out, the chair may still recline, but the sitting experience can feel loose, noisy, or unstable.
- The recliner wobbles: The chair rocks side to side even when placed on a flat floor.
- The chair leans: One side sits lower than the other because the swivel plate, ring, or mounting hardware is worn.
- The base squeaks or grinds: Dry bearings, damaged rollers, or metal-on-metal wear can create noise when turning.
- The chair is hard to swivel: A bent plate, dirty bearing track, or damaged swivel ring can make rotation stiff.
- The chair spins too freely: The base may have worn friction points or missing hardware.
- The base scrapes the floor: Missing floor glides, bent legs, or a sagging base can lower the chair too much.
- Bolts keep loosening: Worn mounting holes or incorrect hardware can let the base shift during use.
- The recliner feels unsafe: If the chair moves unexpectedly, tilts, or makes popping sounds, stop using it until inspected.
A noisy swivel base does not always need full replacement. Sometimes loose bolts, missing washers, dry bearings, damaged floor glides, or trapped debris are the real issue.
What to Check Before Buying a New Swivel Base
Before ordering a replacement, flip the recliner safely and inspect the existing base. Many swivel problems come from loose hardware rather than a failed base.
- Check the floor first: Make sure the recliner is not wobbling because the floor is uneven or a rug edge is underneath it.
- Tighten visible bolts: Loose base bolts can create wobble even when the swivel plate is still good.
- Look for missing washers: Missing washers can allow bolt heads to dig into wood or metal mounting plates.
- Inspect the swivel ring: Look for cracked welds, bent plates, loose bearings, or metal dust.
- Check the mounting board: The base may be fine while the wood underneath the chair is cracked or stripped.
- Inspect floor glides: Missing pads or glides can make the chair scrape or sit unevenly.
- Check for rubbing: Upholstery, dust cover fabric, or a cable may be touching the rotating base.
- Test rotation slowly: Listen for grinding, catching, popping, or scraping from a specific point in the turn.
The measuring process in how to measure recliner parts before you order is useful here because swivel bases depend heavily on diameter, hole spacing, mounting height, and hardware size.
Types of Recliner Swivel Bases
Not every swivel recliner uses the same base style. Matching the correct design matters because the wrong base can change the chair height, tilt, recline angle, or stability.
1. Round Swivel Ring Base
This is one of the most common swivel recliner base styles. It uses a circular metal ring or plate that allows the chair to rotate. Some versions mount between a wooden frame and a metal base, while others attach directly to a round pedestal.
Common signs of failure include grinding, wobbling, metal dust, missing ball bearings, or uneven rotation.
2. Square Swivel Plate
Some recliners use a square or rectangular metal swivel plate with bolt holes in each corner. This style is common on chairs with pedestal-style bases, smaller swivel recliners, and some modern lounge chairs.
The most important measurements are plate size, hole spacing, center clearance, thickness, and weight rating.
3. Swivel Rocker Base
A swivel rocker base combines rotating movement with rocking or gliding movement. These bases are more complex than a simple swivel plate because they include rocker springs, glider arms, or pivot assemblies.
If your chair both swivels and rocks, do not replace it with a basic flat swivel plate unless the original design supports that conversion.
4. Pedestal Swivel Base
Some recliners use a visible round, star, wood, or metal pedestal base. This is common on modern recliners, Scandinavian-style recliners, massage chairs, and lounge recliners.
Matching the height and mounting pattern is especially important because the base affects seat angle and balance.
5. Glider Swivel Base
Glider swivel bases include a track or linkage system that allows forward-and-back motion while also rotating. These bases can be difficult to replace with generic parts because the glider mechanism must line up correctly with the recliner frame.

yaaqoo 25.5" Swivel Recliner Chair Ring Base Heavy Duty Bottom Replacement

Yoogu Heavy Duty 25.5" Recliner Chair Sofa Ring Swivel Base Replacement

Blulu 22 Inch Heavy Duty Recliner Chair Swivel Base Replacement Parts
How to Measure a Recliner Swivel Base
Accurate measurement is the most important part of buying the right replacement. Do not rely only on brand name or chair appearance.
Measurements to Record
- Overall base diameter: Measure the widest point of the circular base or ring.
- Plate width and length: For square or rectangular plates, measure the full outer size.
- Bolt-hole spacing: Measure center-to-center distance between mounting holes.
- Number of mounting holes: Count all holes used to attach the base to the chair and lower frame.
- Mounting-hole diameter: Measure the size of the holes or bolts.
- Base height: Measure from the floor to the bottom of the chair frame.
- Plate thickness: Thicker plates may support more weight but can change the seat height.
- Center opening: Some bases need clearance for wiring, bolts, or pedestal hardware.
- Rotation clearance: Confirm that the base can spin without hitting fabric, cords, or frame parts.
- Weight rating: Replacement parts should support the chair weight plus the user weight.
Take These Photos Before Ordering
- Full underside of the recliner
- Close-up of the swivel plate or ring
- Mounting bolts and washers
- Any labels or stamped part numbers
- Side view showing base height
- Cracked or bent areas
- Wiring near the base on power recliners
- Floor glides or pads underneath the base
Common Measurement Mistakes
- Measuring outside edges instead of center-to-center bolt spacing
- Ignoring chair height after replacement
- Buying a base with the same diameter but different hole pattern
- Forgetting to measure upper and lower mounting holes separately
- Assuming all swivel rings are universal
- Ignoring power cords or actuator wires routed through the base area
If your recliner is already stuck open or tilted, the recliner stuck open common causes and repairs guide can help you confirm whether the base is the issue or whether the reclining mechanism is also jammed.
How to Remove the Old Recliner Swivel Base
Replacing a swivel base is usually easier when the recliner is upside down, but recliners are heavy and awkward. Work slowly and protect the upholstery.
Step 1: Clear the Work Area
Move the recliner away from walls, tables, cords, lamps, and rugs. You need enough space to tip the chair safely and work around the base.
Step 2: Unplug Powered Recliners
If the recliner has power recline, heat, massage, USB ports, lighting, or battery backup, disconnect wall power first. Remove or disconnect the battery backup if equipped.
Step 3: Protect the Floor and Chair
Place a thick furniture blanket, moving pad, or soft mat on the floor. This protects leather, fabric, wood trim, and flooring while the chair is tipped over.
Step 4: Tip the Recliner Safely
Ask another person to help. Tip the chair onto its side or back depending on access. Avoid resting the full weight on delicate arms, cup holders, remotes, side switches, or wooden trim.
Step 5: Photograph the Base
Take photos before removing anything. Capture the bolt locations, washer order, cable routing, base orientation, and any spacer blocks.
Step 6: Mark the Orientation
Use masking tape or a marker to label the front of the base and the front of the chair. This makes it easier to position the replacement correctly.
Step 7: Remove the Mounting Bolts
Use the correct socket, wrench, or hex key. Remove bolts evenly and keep hardware organized. If bolts are stuck, apply gentle pressure and avoid stripping the heads.
Step 8: Separate the Base
Lift the old swivel base away from the frame. If it sticks, check for hidden screws, staples, brackets, or adhesive pads before prying.
Step 9: Inspect the Chair Frame
Before installing the new base, check the mounting surface. Look for cracked wood, stripped holes, bent brackets, loose T-nuts, broken welds, or crushed spacer blocks.
How to Install the Replacement Swivel Base
Step 1: Compare Old and New Parts
Before installing the replacement, compare the new base against the old one.
- Overall diameter or plate size
- Bolt-hole spacing
- Mounting-hole count
- Base height
- Thickness
- Rotation direction and clearance
- Weight rating
- Floor contact points
Do not continue if the bolt holes are close but not exact. Forcing misaligned bolts can twist the plate, strip the frame, or create wobble.
Step 2: Clean the Mounting Area
Vacuum dust, metal shavings, pet hair, old grease, and debris. Wipe the mounting surface so the new base sits flat.
Step 3: Position the New Base
Line up the front orientation marks. Make sure any open side, cable slot, stop tab, or raised section faces the same direction as the old base.
Step 4: Start All Bolts by Hand
Thread each bolt loosely before tightening any of them fully. This helps the base settle evenly and prevents cross-threading.
Step 5: Tighten in a Cross Pattern
Tighten bolts gradually, moving diagonally across the base. This distributes pressure evenly and reduces the chance of twisting the plate.
Step 6: Check Rotation Before Flipping the Chair Upright
Rotate the base by hand. It should move smoothly without scraping, grinding, binding, or hitting wires.
Step 7: Route Wires Safely
On power recliners, keep cords away from the rotating plate. Leave enough slack for reclining movement, but secure loose wires so they do not wrap around the swivel.
Step 8: Return the Chair Upright
With help, carefully return the recliner to its normal position. Set it on a flat surface and check whether all floor contact points sit evenly.
Step 9: Test the Chair
Sit gently and test:
- Swivel movement
- Recline movement
- Rocking or gliding movement if equipped
- Chair stability
- Noise during rotation
- Floor clearance
- Power cords during movement
The older guide on how to put a swivel base on a Lazy Boy recliner is also useful if you want a basic visual-style process for removing and attaching a swivel base.
yaaqoo 25.5" Swivel Recliner Chair Ring Base Heavy Duty Bottom Replacement
Yoogu Heavy Duty 25.5" Recliner Chair Sofa Ring Swivel Base Replacement
Common Problems During Swivel Base Replacement
The Bolt Holes Do Not Line Up
This usually means the replacement base is not the correct match. Do not drill new holes unless you are sure the frame can safely support the load and the chair will remain balanced. Misaligned bases can make the recliner unstable.
The Chair Sits Too High or Too Low
Base height affects comfort, recline angle, and floor clearance. A taller base may make the chair feel unstable. A shorter base may cause the mechanism, upholstery, or footrest to rub the floor.
The Chair Wobbles After Replacement
Possible causes include:
- Loose mounting bolts
- Missing washers
- Uneven floor
- Incorrect base size
- Bent replacement plate
- Damaged chair frame
- Wrong spacer height
The Swivel Feels Stiff
A new base may feel slightly tighter than an old worn one, but it should not grind or bind. Check that the base is not overtightened, misaligned, or rubbing against fabric or wiring.
The Chair Scrapes the Floor
Check floor glides, rubber feet, base height, and whether the base is bent downward. Do not continue using a chair that drags metal across the floor.
The Base Makes a Popping Sound
Popping can come from loose bolts, shifting mounting boards, cracked welds, damaged bearings, or a frame flexing under load. Stop using the chair until you identify the source.
The Power Cord Wraps Around the Base
This is a common problem after swivel-base work on powered recliners. Route cords with enough slack for reclining, but keep them clipped away from the rotating ring.
Helpful Parts and Product Searches
These searches are useful once you have measured your original base and know what style you need.
- Recliner swivel base replacement – useful for full base assemblies and common round replacement bases.
- Recliner swivel plate replacement – helpful when replacing a square or round metal swivel plate.
- Heavy-duty swivel plate for chair – best searched after confirming plate size and weight rating.
- Recliner base hardware kit – useful for missing bolts, washers, and mounting hardware.
- Furniture floor glides for recliner base – helpful when the base is scratching floors or sitting unevenly.
- Silicone spray lubricant for chair swivel base – useful for dry metal contact points, but not a fix for broken bearings or bent plates.

Yoogu Heavy Duty 24" Recliner Chair Furniture Ring Swivel Base Replacement
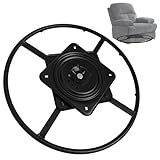
Racfenick 27 inch Recliner Swivel Ring Base Replacement with Plate
Yoogu Heavy Duty 25.5" Recliner Chair Sofa Ring Swivel Base Replacement
Tools You May Need
- Phillips screwdriver
- Flathead screwdriver
- Metric and SAE socket set
- Adjustable wrench
- Allen or hex key set
- Needle-nose pliers
- Locking pliers
- Drill with bits, only if frame repair or pilot holes are needed
- Digital caliper or tape measure
- Masking tape or marker for orientation labels
- Rechargeable work light
- Furniture blanket or padded moving mat
- Small container for bolts and washers
- Silicone spray or dry PTFE lubricant
- Wood glue and clamps if the mounting board needs repair
A recliner repair tool kit can help if you regularly fix chair hardware, bases, handles, cables, or mechanisms.

House2Home Upholstery Spring Replacement Chair Kit 18" 2pk

SagsAway 3 Piece Sagging Recliner DIY Repair Kit. No Tools Needed. High Density, Flexible Foam Padding Reinforcement. Three 16 Inch Firm Supports Per Set, Per Seat to Extend the Life of Recliners
Safety Tips Before and After Replacement
- Do not work alone if the chair is heavy: Recliners can tip suddenly and damage the chair or injure you.
- Unplug powered chairs: Disconnect wall power and battery backup before working underneath.
- Support the chair securely: Do not rely on one armrest or a tilted position that can collapse.
- Keep fingers away from pinch points: Swivel rings, glider arms, springs, and recliner mechanisms can pinch hard.
- Do not reuse damaged bolts: Bent, stripped, or rusted hardware should be replaced with matching hardware.
- Check the frame: A new base is not safe if the chair frame is cracked or the mounting board is weak.
- Test gently first: Sit slowly and shift your weight carefully after installation.
- Check clearance: Make sure the base does not rub upholstery, power cords, the floor, or the reclining mechanism.
Stop using the recliner if it leans, pops, scrapes, or feels unstable after replacement.
Maintenance Tips for Swivel Recliners
- Vacuum under the base regularly: Dust, pet hair, and grit can collect around the swivel ring.
- Check bolts every few months: Swivel movement can slowly loosen mounting hardware.
- Protect floors: Replace worn glides or pads before metal contacts the floor.
- Do not drag the chair sideways: Lift or slide carefully to avoid bending the base.
- Lubricate only where appropriate: Use a light amount on dry metal contact points if the design allows it.
- Keep power cords clear: On powered swivel recliners, route cords so they cannot wrap around the base.
- Avoid sudden spinning: Hard spinning can stress the bearings, wiring, and mounting bolts.
- Watch for early wobble: Fix small looseness before it damages mounting holes or the frame.
- Use the chair within its rating: Overloading the recliner can damage the base, bearings, frame, and mechanism.
Frequently Asked Questions
Can I replace a recliner swivel base myself?
Yes, many swivel bases can be replaced with basic tools if you can safely tip the chair, measure the old base, and match the bolt pattern. Heavy chairs, damaged frames, and complex swivel-rocker bases may need a technician.
Are recliner swivel bases universal?
No. Some bases look similar but use different diameters, bolt patterns, heights, plate thicknesses, and weight ratings. Always measure the original base before ordering.
Why is my swivel recliner wobbling?
Common causes include loose bolts, missing washers, worn bearings, bent swivel plates, damaged floor glides, uneven flooring, or a cracked mounting board.
Can I stop a swivel recliner from swiveling?
Sometimes, but it depends on the base design. Blocking the swivel incorrectly can damage the base or make the chair unsafe. Use a proper stop method or compatible non-swivel base if available.
Why does my recliner swivel base squeak?
Squeaking can come from dry metal contact points, loose hardware, worn bearings, floor contact, or the base rubbing against fabric or wiring.
Can I lubricate a recliner swivel base?
Yes, but only lightly and only on appropriate metal contact points. Do not soak upholstery, wood, electronics, or friction-locking surfaces. Lubrication will not fix bent plates or broken bearings.
How do I know what size swivel base I need?
Measure the overall base diameter, plate size, bolt-hole spacing, mounting-hole diameter, base height, and center clearance. Also compare weight rating and mounting style.
Can I install a swivel base on a non-swivel recliner?
Sometimes, but the chair frame must be strong enough, the seat height must remain safe, and the recline mechanism must clear the base. A wrong conversion can make the recliner unstable.
Why does my chair sit crooked after replacing the base?
The base may be misaligned, the floor may be uneven, the mounting board may be cracked, hardware may be loose, or the replacement base may have the wrong height or bolt pattern.
Should I reuse the old bolts?
Only reuse bolts if they are straight, clean, undamaged, and the correct size. Replace stripped, bent, rusty, or worn hardware with matching grade and thread size.
What if the mounting holes in the wood are stripped?
Do not simply tighten the bolts harder. The mounting board may need repair with proper inserts, larger approved hardware, reinforcement, or replacement wood support.
Can a bad swivel base affect reclining?
Yes. If the base allows the chair to lean, twist, or shift, the reclining mechanism may bind, scrape, or move unevenly.
Is replacing a swivel base worth it?
Usually, yes, if the chair frame and upholstery are still good and the correct replacement base is available. If the frame is cracked or the base is proprietary and unavailable, replacement may be less practical.
Conclusion
A recliner swivel base replacement is mostly about careful measuring, safe handling, and matching the original mounting pattern. Check for loose hardware first, inspect the frame, then compare diameter, bolt spacing, height, and weight rating before buying. A properly matched base can make the chair feel stable, smooth, and comfortable again.

ttmagic Metal Recliner Handle Replacement Parts with Cable, Universal Recliner Sofa Chair Couch Release Lever Pull Handle, Fits Ashley and Major Recliner Brands, Exposed Cable Length 4.9“
Baridwon Recliner Replacement Parts with Pull Handle and Release Cable (2-Sets), Repair Recliner Mechanism Parts Compatible with Most Furniture of Recliner Sofa Couch Chair

Baridwon 2 Sets Recliner Replacement Parts - Metal Recliner Handle, Release Pull Cable Fits Ashley & Most Recliner Sofas, Exposed Cable Length 5.1 Inches
ttmagic Universal Heavy-Duty Metal Sofa Chair Recliner Release Pull Handle Replacement Parts, Fits Ashley, Lazy Boy and Most Recliner Brands, 3.5"L x 3"W x 1.2"H Handle Size
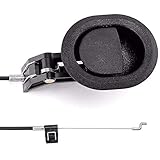
ttmagic Sofa Chair Recliner Release Pull Handle 3" by 3.5" Replacement Parts with Cable, Fits Ashley Lazy Boy and Most Recliner Brands Couch Sofa Chair Furniture, Exposed Cable Length 4.9"