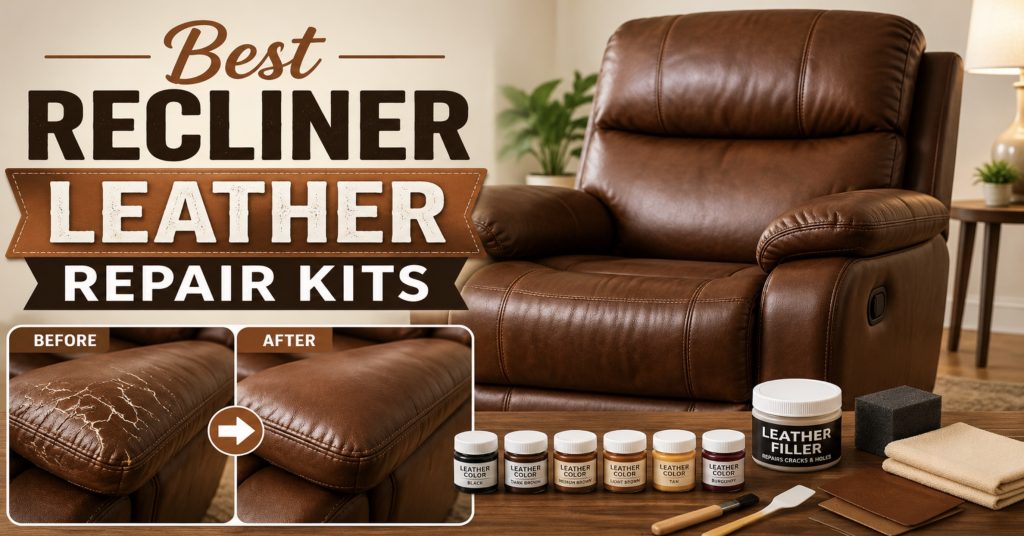
Leather recliners are comfortable, but scratches, peeling spots, fading, and tiny cracks can make them look tired fast. The right leather repair kit can help with small surface damage, color touch-ups, worn armrests, and scuffed footrests—without replacing the whole chair.
- What a Recliner Leather Repair Kit Can Fix
- Best Types of Recliner Leather Repair Kits
- Real Leather vs Faux Leather vs Bonded Leather
- How to Choose the Right Leather Repair Kit
- How to Match the Color Correctly
- How to Prepare the Recliner Before Repair
- Step-by-Step Leather Repair Process
- Common Recliner Areas That Need Repair
- Common Mistakes to Avoid
- Useful Product Searches
- How to Make the Repair Last Longer
- Frequently Asked Questions
What a Recliner Leather Repair Kit Can Fix
A leather repair kit is best for cosmetic and light surface damage. It can make a worn recliner look much better, especially when the damage is shallow and the structure underneath is still solid.
- Light scratches: Small pet scratches, fingernail marks, and surface scuffs can often be filled or recolored.
- Color fading: Armrests, headrests, and footrests often fade from body oils, sunlight, and regular use.
- Small cracks: Fine surface cracks can sometimes be softened, filled, and color-matched.
- Tiny punctures: Small holes can be filled if the surrounding material is still strong.
- Peeling edges: Minor peeling on vinyl or bonded leather can sometimes be patched, but results vary.
- Worn high-contact spots: Armrests, seat edges, and footrest tops can be recolored when the finish is worn.
- Discoloration: Dye transfer, faded patches, and uneven finish can sometimes be blended with color repair compounds.
A repair kit will not rebuild badly torn upholstery, collapsed foam, broken stitching, split seams, or large missing sections of material. For major damage, you may need upholstery work, a replacement panel, or a professional repair.
Best Types of Recliner Leather Repair Kits
The best kit depends on the type of damage. A scratch kit is not the same as a full filler-and-color kit, and a conditioner is not the same as a repair compound.
1. Leather Color Repair Kit
A color repair kit is best when the recliner surface is still smooth but the finish has faded, rubbed off, or become uneven. These kits usually include color compounds, mixing instructions, applicators, and sometimes a topcoat.
Best for:
- Faded armrests
- Worn headrest areas
- Scuffed footrests
- Uneven color patches
- Small areas where the finish has rubbed away
A leather color repair kit for furniture is a good starting search when the leather is not torn but looks faded or patchy.

Leather & Vinyl Repair Kit for Furniture, Car Seats & Couches, 10 Colors | Leather Repair Kit with 10 Mixable Colors for Car Seats, Couches & Furniture – Fix Tears, Cracks, Scratches, Holes & Peeling

COCONIX Leather & Vinyl Repair Kit for Furniture, Car Seats, Sofas & Marine | Leather repair for tears, holes, scratches & peeling on couches, car seats, boat seats, jackets, shoes, purses & faux leather

Brown Leather Repair Kit for Furniture & Couches, Car Seat Vinyl Repair Kit | Leather Couch Repair Kit, Faux Leather Repair Kit & Vinyl Repair; Fixes Scratches, Cracks, Tears & Peeling; Any Brown Shade
2. Leather Filler Repair Kit
A filler kit is better for cracks, scratches, small gouges, and tiny surface gaps. These kits usually include a flexible filler compound that dries into the damaged area before color is added.
Best for:
- Fine cracking
- Cat scratches
- Small gouges
- Surface splits
- Rough worn patches
Search for a leather filler repair kit for couch when the surface needs smoothing before color repair.
3. Leather and Vinyl Repair Kit
Many recliners are not full-grain leather. Some are leather match, faux leather, vinyl, PU leather, or bonded leather. A leather-and-vinyl kit is useful when you are not completely sure what the recliner material is.
Best for:
- Faux leather recliners
- Vinyl recliners
- Leather-match recliners
- Small rips
- Color touch-ups on synthetic upholstery
A leather and vinyl repair kit for recliner is often more practical for budget recliners or leather-match furniture.
Leather & Vinyl Repair Kit for Furniture, Car Seats & Couches, 10 Colors | Leather Repair Kit with 10 Mixable Colors for Car Seats, Couches & Furniture – Fix Tears, Cracks, Scratches, Holes & Peeling
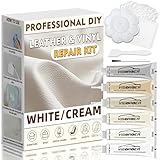
Vigorder Cream Leather Repair Kit for Furniture, Vinyl Repair Kit for Car Interior, Sofa, Purse and Jacket, Restore Any Material with Super Easy Instructions to Fix Scratches, Tears, Holes, Peeling

COCONIX Black Leather & Vinyl Repair Kit for Car Seats, Couches & Furniture | Black leather repair, vinyl seat repair, car interiors, couches, furniture, tears, holes, scratches, peeling, jackets & shoes
4. Leather Scratch Repair Kit
Scratch repair kits are usually simpler than filler kits. They are designed for shallow surface marks rather than deep cuts.
Best for:
- Pet claw marks
- Light scuffs
- Small surface scratches
- Finish-level damage
- Armrest wear
Search for a leather scratch repair kit for recliner if the damage has not cut deeply through the upholstery.
5. Leather Patch Repair Kit
Patch kits are better for bigger damage where filler alone will not hold. These kits may include adhesive-backed patches, grain-textured material, or flexible backing fabric.
Best for:
- Larger tears
- Holes in side panels
- Worn corners
- Damaged footrest edges
- Areas where material is missing
A leather repair patch for recliner can be useful when the damaged area needs physical coverage, not just color.
6. Leather Conditioner and Cleaner Kit
Conditioner is not a true repair kit, but it is important before and after repair. Dirty, dry leather does not accept filler, dye, or color compound as evenly.
Best for:
- Dry leather
- Dull finish
- Body oil buildup
- Light maintenance
- Preventing future cracking
For prep and cleaning basics, the guide on how to clean a leather recliner is a helpful place to start before applying any repair product.
A leather cleaner and conditioner for recliner is useful for ongoing care, but do not apply conditioner immediately before a color repair unless the repair kit instructions say it is okay.
Real Leather vs Faux Leather vs Bonded Leather
Before buying a kit, try to identify the recliner material. The wrong repair product may peel, stay sticky, crack again, or fail to blend.
Real Leather Recliners
Real leather usually has natural grain variation, a warmer feel, and a flexible surface. It may absorb conditioner gradually. High-quality leather repair kits with flexible fillers and color compounds usually work best.
Leather-Match Recliners
Leather-match recliners may use real leather on seating areas and vinyl or synthetic material on sides and backs. One recliner can require different repair approaches depending on the panel.
Faux Leather or PU Leather Recliners
Faux leather often peels when the top coating separates from the backing. Small peeling spots may be improved with filler, patch, and color repair, but large peeling areas are hard to make permanent.
Bonded Leather Recliners
Bonded leather is usually the hardest to repair long-term. Once it starts peeling widely, patching may only be a temporary cosmetic fix. Large failing sections may need reupholstery or a fitted cover.
Vinyl Recliners
Vinyl repair kits can work well on small punctures and surface damage, especially when the kit is designed for flexible furniture upholstery.
How to Choose the Right Leather Repair Kit
A good recliner leather repair kit should match the material, damage type, color, and flexibility of the chair.
Check the Damage Type
- Scuffs only: Use a color touch-up or scratch repair kit.
- Fine cracks: Use flexible filler plus color compound.
- Small hole: Use filler or backing fabric depending on depth.
- Larger tear: Use a patch kit or professional upholstery repair.
- Peeling faux leather: Use a vinyl/faux leather kit, but expect limited durability on large areas.
- Dry leather: Clean and condition first, then repair only if needed.
Look for Flexible Compounds
Recliners move, flex, and stretch more than many other furniture pieces. The seat, footrest, arms, and backrest bend as the chair opens and closes. A stiff repair compound can crack quickly.
Check Color Mixing Options
Single-color kits are convenient when your recliner is a common black, brown, gray, tan, or white. Multi-color mixing kits are better when the recliner has an unusual shade, distressed finish, two-tone leather, or warm undertones.
Check Finish Level
Leather can be matte, satin, semi-gloss, or glossy. A good repair is not only about color; the shine level also needs to blend.
Read the Cure Time
Some repairs need several hours or a full day to cure. Do not use the recliner too soon, especially on high-contact areas like the seat cushion or footrest.
Check Included Tools
Useful kit items may include:
- Color compounds
- Flexible filler
- Backing fabric
- Adhesive
- Grain paper
- Spatula
- Mixing cup
- Applicator sponge
- Cleaning prep solution
- Topcoat or sealant
The Recliner Parts & Repairs hub is useful if you are also dealing with damaged recliner mechanisms, switches, handles, springs, or other non-upholstery problems.
How to Match the Color Correctly
Color matching is usually the hardest part of leather repair. Even “dark brown” kits can vary from chocolate to espresso to reddish brown.
Best Color-Matching Tips
- Match in natural light: Indoor lighting can make brown, gray, and black leather look different.
- Clean before matching: Dirt and body oils can make leather look darker than it really is.
- Use a hidden area: Match the original color from under a cushion, back flap, or lower side panel.
- Mix slowly: Add tiny amounts of color at a time instead of making big changes.
- Let test spots dry: Many compounds dry darker or lighter than they look when wet.
- Match the sheen: A perfect color can still look wrong if the repair dries too shiny.
Common Recliner Leather Colors
- Black
- Espresso brown
- Chocolate brown
- Chestnut brown
- Tan
- Beige
- Cream
- Gray
- Burgundy
- Navy
Searches like brown leather repair kit for furniture, black leather repair kit for recliner, or gray leather repair kit for furniture can help you narrow results by color.
Brown Leather Repair Kit for Furniture & Couches, Car Seat Vinyl Repair Kit | Leather Couch Repair Kit, Faux Leather Repair Kit & Vinyl Repair; Fixes Scratches, Cracks, Tears & Peeling; Any Brown Shade
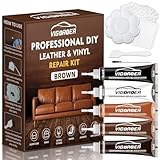
Brown Leather Repair Kit for Furniture, Leather Couch Repair Kit for Car Interior, Sofa, Purse and Jacket, Restore Any Material with Super Easy Instructions to Fix Scratches, Tears, Holes, Peeling

Vigorder Brown Leather Repair Kit for Furniture, Leather Couch Repair Kit for Furniture, Sofa, Jacket, Purse – Super Easy Instructions to Fix Scratches, Tears, Holes, and Peeling
How to Prepare the Recliner Before Repair
Good prep makes the difference between a repair that blends and one that flakes off quickly.
Step 1: Vacuum the Recliner
Remove dust, crumbs, pet hair, and loose debris from seams, cushion gaps, armrests, and footrest edges.
Step 2: Clean the Damaged Area
Use a leather-safe cleaner or the prep solution included with the kit. Remove body oils, lotion, conditioner residue, and grime. Repair compounds do not stick well to oily surfaces.
Step 3: Let the Area Dry Fully
Do not apply filler or color compound to damp leather. Moisture can interfere with adhesion and cause uneven drying.
Step 4: Trim Loose Fibers or Peeling Edges
Use small scissors to remove loose threads or flakes that are no longer attached. Do not cut into healthy upholstery.
Step 5: Lightly Smooth Rough Edges
Some kits include fine sandpaper. Use it gently only if the instructions recommend it. Aggressive sanding can damage the leather grain.
Step 6: Mask Nearby Areas
Use painter’s tape around the repair if needed, especially when working near stitching, fabric panels, cup holders, wood trim, or plastic controls.
Step 7: Test in a Hidden Spot
Apply a tiny amount of cleaner, filler, color, or topcoat underneath the chair or behind a cushion to make sure it does not react badly.
Step-by-Step Recliner Leather Repair Process
The exact steps vary by kit, but most repairs follow this general process.
Step 1: Identify the Material
Check whether the recliner is real leather, faux leather, bonded leather, vinyl, or leather match. Use a product made for that surface.
Step 2: Choose the Right Repair Method
Use color repair for fading, filler for cracks, patches for larger holes, and conditioner for dry leather. Do not use filler when the only problem is surface dryness.
Step 3: Clean and Dry the Surface
Repair products need a clean base. Remove oils and residue before applying anything.
Step 4: Apply Backing Fabric if Needed
For holes or deeper tears, slide backing fabric behind the damaged area if the kit includes it. This gives filler or adhesive something to grab.
Step 5: Apply Flexible Filler
Use thin layers instead of one thick blob. Let each layer dry according to the instructions. Thin layers blend better and crack less.
Step 6: Smooth the Surface
Once dry, lightly smooth the filled area if the kit allows it. Avoid sanding surrounding leather unnecessarily.
Step 7: Mix the Color
Blend the repair color slowly. Test on a hidden spot and let it dry before applying it to the visible area.
Step 8: Apply Color in Thin Layers
Dab or sponge the color compound gradually. Build coverage slowly so the repair blends with the surrounding leather.
Step 9: Add Grain Texture if Included
Some kits include grain paper or texture pads. Use them while the compound is at the correct stage, following the kit instructions.
Step 10: Seal the Repair
If the kit includes a finish or topcoat, apply it after the color has dried. This helps protect the repair from rubbing and moisture.
Step 11: Let It Cure
Avoid sitting, reclining, cleaning, or conditioning the repaired area until it is fully cured. High-contact areas need extra time.
Step 12: Condition Later
After the repair has cured completely, condition the surrounding leather as recommended. Do not soak the repair with conditioner immediately.

Besezx Leather Repair Patch Tape Kit, Self Adhesive Leather Repair for Furniture, Couch, Sofa, Car Seats,Office Chair,Vinyl Repair Kit.30inx16in
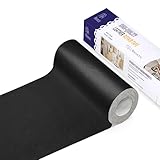
Besezx Leather Repair Patch Tape Kit,Vinyl Repair Kit,Self Adhesive Leather Repair for Furniture, Couch, Sofa, Car Seats,Office Chair.3.1inx60in-Black
Brown Leather Repair Kit for Furniture & Couches, Car Seat Vinyl Repair Kit | Leather Couch Repair Kit, Faux Leather Repair Kit & Vinyl Repair; Fixes Scratches, Cracks, Tears & Peeling; Any Brown Shade
Common Recliner Areas That Need Leather Repair
Armrests
Armrests collect body oils, sweat, lotion, and friction. They often fade, crack, or become shiny before the rest of the chair.
Best products:
- Leather cleaner
- Color repair compound
- Flexible filler for cracks
- Leather topcoat
Headrest
Headrests fade and discolor from hair products and skin oils. Cleaning is especially important before any color repair.
Best products:
- Leather-safe degreaser
- Color restorer
- Conditioner
- Matte or satin finish topcoat
Footrest
Footrests take shoe scuffs, pet scratches, pressure marks, and friction. Repairs here need to stay flexible because the footrest moves.
Best products:
- Scratch repair kit
- Flexible filler
- Leather/vinyl repair kit
- Protective finish
Seat Cushion
Seat cushions are high-stress areas. Small cracks and color loss can be repaired, but large tears may need professional upholstery work.
Best products:
- Flexible filler
- Color repair kit
- Backing fabric for small holes
- Durable topcoat
Side Panels
Side panels often get scratched by walls, tables, pet claws, and moving the recliner.
Best products:
- Patch kit
- Color compound
- Vinyl repair kit if synthetic
- Leather cleaner
Common Leather Repair Mistakes to Avoid
- Skipping cleaning: Oils and dirt prevent filler and color from sticking properly.
- Using the wrong kit: Real leather, vinyl, faux leather, and bonded leather may need different products.
- Applying thick filler: Thick layers can dry unevenly, look raised, or crack later.
- Not testing color first: Wet color can look very different after drying.
- Ignoring finish sheen: A shiny patch on matte leather is very noticeable.
- Using household glue: Random glue may become hard, stain the leather, or fail when the recliner flexes.
- Repairing active peeling too soon: Loose bonded leather will keep peeling unless unstable edges are removed or covered.
- Sitting too soon: Repairs need time to cure, especially on seats and footrests.
- Over-conditioning: Too much conditioner can soften, darken, or interfere with future repairs.
Useful Product Searches
These searches are useful once you know the damage type and upholstery material.
- Leather repair kit for recliner chair – a broad search for general recliner leather repair kits.
- Leather filler repair kit for couch – helpful for cracks, gouges, and shallow splits.
- Leather and vinyl repair kit for furniture – useful for faux leather, leather match, vinyl, and mixed-material recliners.
- Leather repair patch for recliner – better for holes, torn corners, and larger missing areas.
- Leather scratch repair kit for furniture – useful for pet scratches and surface scuffs.
- Leather cleaner and conditioner for furniture – best for prep, regular care, and preventing dryness.
How to Make the Repair Last Longer
- Clean gently: Use leather-safe cleaners instead of harsh household cleaners.
- Condition real leather: Keep genuine leather from drying out and cracking again.
- Keep sunlight controlled: Direct sun can fade leather and dry repair areas.
- Avoid sharp objects: Keys, belt buckles, pet claws, and toys can cut through fresh repairs.
- Use throws carefully: A soft throw can protect armrests or headrests, but avoid trapped moisture.
- Let repairs fully cure: Do not rush use on seat cushions or footrests.
- Keep pets’ nails trimmed: This helps prevent repeat scratches.
- Wipe body oils regularly: Armrests and headrests break down faster when oils build up.
- Repair small damage early: Tiny cracks and scratches are easier to fix than large peeling areas.
If your recliner leather damage happened while repairing a handle, motor, base, or other part, use the measuring advice in how to measure recliner parts before you order before buying replacement hardware.
Frequently Asked Questions
Do leather repair kits really work on recliners?
Yes, they can work well for small scratches, light cracks, scuffs, fading, and minor surface damage. They are less effective on large tears, badly peeling bonded leather, collapsed foam, or split seams.
What is the best leather repair kit for a recliner?
The best kit depends on the damage. Use color repair for fading, flexible filler for cracks, patch kits for holes, and leather/vinyl kits for synthetic upholstery.
Can I repair peeling bonded leather?
Small peeling spots can sometimes be patched or coated, but large bonded leather peeling is difficult to repair permanently. A cover or reupholstery may be more practical.
Can I use a leather repair kit on faux leather?
Only if the kit says it works on faux leather, vinyl, or PU leather. Real leather products may not bond correctly to synthetic upholstery.
How do I match the leather color?
Clean the chair first, compare the color in natural light, use a hidden area as your reference, mix slowly, and let test spots dry before applying to the visible area.
Should I clean the recliner before using a repair kit?
Yes. Dirt, body oils, conditioners, and lotion residue can prevent filler, dye, and adhesive from bonding properly.
Can a leather repair kit fix cat scratches?
Light cat scratches can often be improved with scratch repair or color repair products. Deep claw marks may need flexible filler and color blending.
Can I repair a tear on the seat cushion?
Small tears may be repaired with backing fabric, filler, and color compound. Large tears on high-stress seat areas often need professional upholstery repair.
How long does leather repair take to dry?
Drying time depends on the kit, layer thickness, temperature, and humidity. Many repairs need several hours, and high-contact areas may need a full day or more before use.
Why does my repair look shiny?
The color may match, but the finish sheen may not. A matte, satin, or gloss topcoat may be needed to blend the repaired area with the surrounding leather.
Can I condition leather after repairing it?
Yes, but wait until the repair has fully cured. Applying conditioner too soon can soften or weaken the repair.
Is it better to patch or fill a hole?
Small shallow damage can often be filled. Larger holes usually need backing fabric or a patch because filler alone may not have enough support.
Can I use super glue on recliner leather?
Super glue is usually too hard and brittle for flexible recliner upholstery. It can stain the material and crack when the chair moves.
Should I repair or replace badly damaged recliner upholstery?
Small surface damage is worth repairing. Large peeling areas, split seams, missing panels, and torn seat cushions may be better handled with upholstery replacement or a professional repair.
Conclusion
The best recliner leather repair kit is the one that matches your material and damage type. Use color kits for fading, filler kits for cracks, patch kits for holes, and conditioner for maintenance. Clean first, test in a hidden area, work in thin layers, and give the repair enough time to cure before using the chair again.
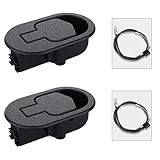
Baridwon 2 Set Recliner Replacement Parts, Durable Recliner Release Pull Handle with Recliner Pull Cable, Repair Replacement Parts Compatible with Most Furniture of Recliner Chair Sofa Couch
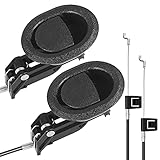
Baridwon Recliner Lever Parts, Handle with Exposed Cable 4.75in, 2 Sets | Recliner mechanism repair kit: release pull handle and cable for sofa, couch, chair; compatible with most furniture

Nonley Recliner Pull Handle - Universal Replacement Parts for Most Major Recliner Couch Sofa Chair Furniture
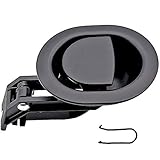
ttmagic Universal Heavy-Duty Metal Sofa Chair Recliner Release Pull Handle Replacement Parts, Fits Ashley, Lazy Boy and Most Recliner Brands, 3.5"L x 3"W x 1.2"H Handle Size

ttmagic Metal Recliner Handle Replacement Parts with Cable, Universal Recliner Sofa Chair Couch Release Lever Pull Handle, Fits Ashley and Major Recliner Brands, Exposed Cable Length 4.9“