A loose footrest, a backrest that won’t lock, or a seat that sags often traces back to worn or broken springs. This step-by-step guide shows you how to diagnose the problem, select the correct replacement springs, and install them safely—whether your chair uses coil/tension springs on the mechanism or serpentine (zig-zag) support springs under the seat. Along the way, you’ll find in-content links to helpful tools and parts on Amazon (search pages; verify fit before purchase).
Common Symptoms That Point to Spring Problems
- Footrest won’t stay up or down: Tension/assist spring on the ottoman linkage has stretched or snapped.
- Recline feels “loose” or won’t hold angle: Return/assist spring in the main mechanism is weak, or a spring clip popped off.
- Seat sags or leans to one side: One or more serpentine (zig-zag) springs or their clips/hog rings let go.
- Clicking/metal ping sound when moving: Spring eye is deforming, rubbing the frame, or a clip is walking out.
Safety First
- Unplug power recliners and remove the battery backup (if present).
- Work with the chair inverted (on blankets) so gravity isn’t fighting you.
- Springs are stored energy: Use pliers made for springs and keep hands clear of the line of pull.
- Eye & hand protection: Wear safety glasses and mechanic gloves.
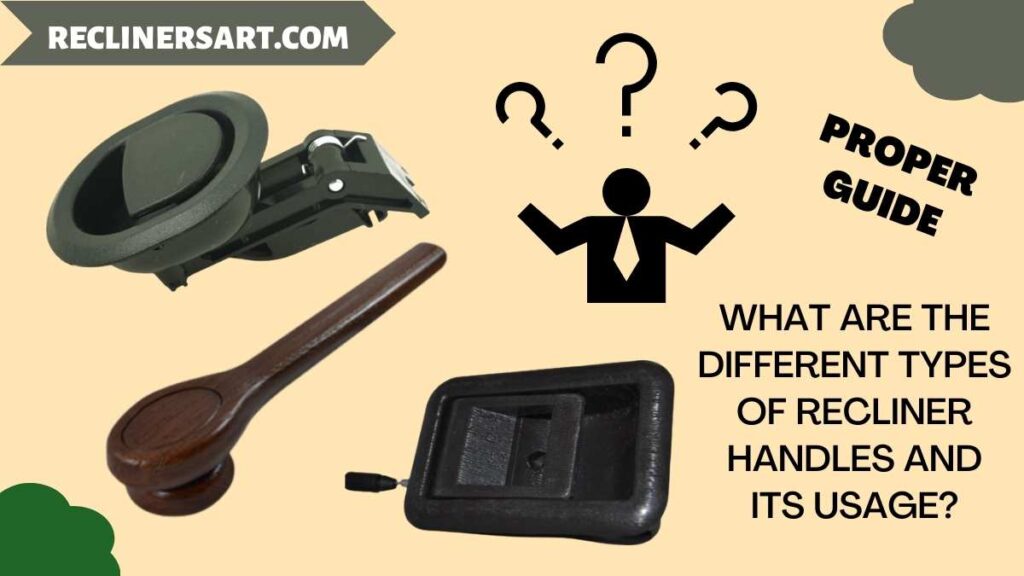
Identify Your Spring Type
- Mechanism tension/assist springs (coil with hooks): Typically connect the main recliner linkage or footrest lever to the frame for return force. Search: recliner tension springs, assist springs.
- Serpentine (zig-zag) seat/back support springs: Upholstery springs that run front-to-back across the seat deck. Search: zig-zag/serpentine springs, spring clips, hog-ring pliers.
- Recline cable/handle issues (not a spring, but similar symptoms): If the lever pulls with no resistance, check the pull handle & cable first.
Measure Before You Order
- Hook-to-hook length (relaxed): Measure the uninstalled spring end-to-end, including hooks.
- Wire diameter (gauge): Use a digital caliper to measure the coil wire; this correlates to spring rate.
- Coil outside diameter and number of coils (if relevant to listing specs).
- Anchor style: Note if the spring hooks into a hole, tab slot, or uses a clip.
- Tension springs — coil springs with hooks for footrest/linkage return force.
- Serpentine spring kits — zig-zag wire runs and clips to restore even seat/back support.
- Spring pliers — leverage tool to stretch/seat serpentine springs safely.
- Hog-ring pliers & rings — secure springs to border wire/webbing like OEM.
- Stretch tools — tighten webbing/burlap when rebuilding the deck.
- Silicone lubricant — quiets pivots without staining fabric/foam.
Tools & Materials
- Staple remover or flat pry bar (for dust cover).
- Upholstery stapler + 3/8″–1/2″ staples (to reinstall dust cover).
- Locking pliers, needle-nose pliers, and spring puller.
- Hog-ring pliers & rings (for serpentine springs).
- Gloves, safety glasses, shop light.
- Replacement parts: tension spring kit, serpentine springs + clips, optional pull handle/cable.
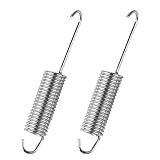
2 Pack 4-1/2 Inch Recliner Spring Stainless Steel Tension Spring Heavy Duty Rust-Resistant Spring Replacement for Recliner Mechanism Sofa Bed Folding Beds Trampolines RV Furniture Long Neck Hook

kzfuli 3-5/8 Inch Replacement Recliner Chair Mechanism Furniture Tension Springs Long Neck Style ,Long Neck Hook Style-Recliner Replacement Parts-3.46 Inch Inside Hook to Hook (Silver White 2Pcs)

Aocies 4-3/4 inch Recliner Sofa Chair Replacement Springs (2 pcs) Mechanism Tension Sofa Chair Stainless Steel Spring
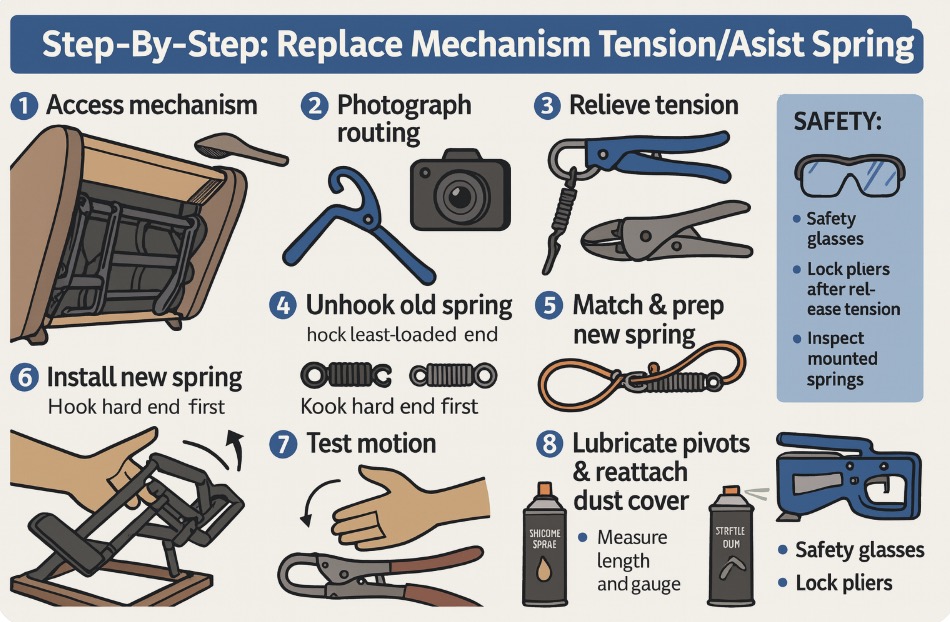
Step-By-Step: Replace Mechanism Tension/Assist Springs
- Access the mechanism: Tip the recliner onto its back. Remove fabric dust cover staples to expose the frame if needed.
- Photograph the routing: Take clear photos of how the spring is hooked (which hole/slot, direction of pull).
- Relieve tension: Move the linkage to the most relaxed position (usually footrest open). Use a helper to stabilize the linkage if necessary.
- Unhook the old spring: With spring puller or locking pliers, unhook from the least loaded end first. Watch for sharp edges.
- Match & prep the new spring: Compare hook length, coil diameter, and overall length. If slightly longer/shorter, you may be able to change the frame hole used—but avoid overstressing the linkage.
- Install the new spring: Hook the harder-to-reach end first. Pull the free end into position using a puller tool or a loop of strong cord as a temporary handle.
- Test motion by hand: Cycle the mechanism slowly. Ensure the spring isn’t rubbing, pinching fabric, or bottoming out at extremes.
- Lubricate pivots (optional): A light silicone spray on metal-to-metal pivots (not on upholstery) can quiet squeaks.
- Reattach dust cover: Staple the fabric back neatly with an upholstery stapler.
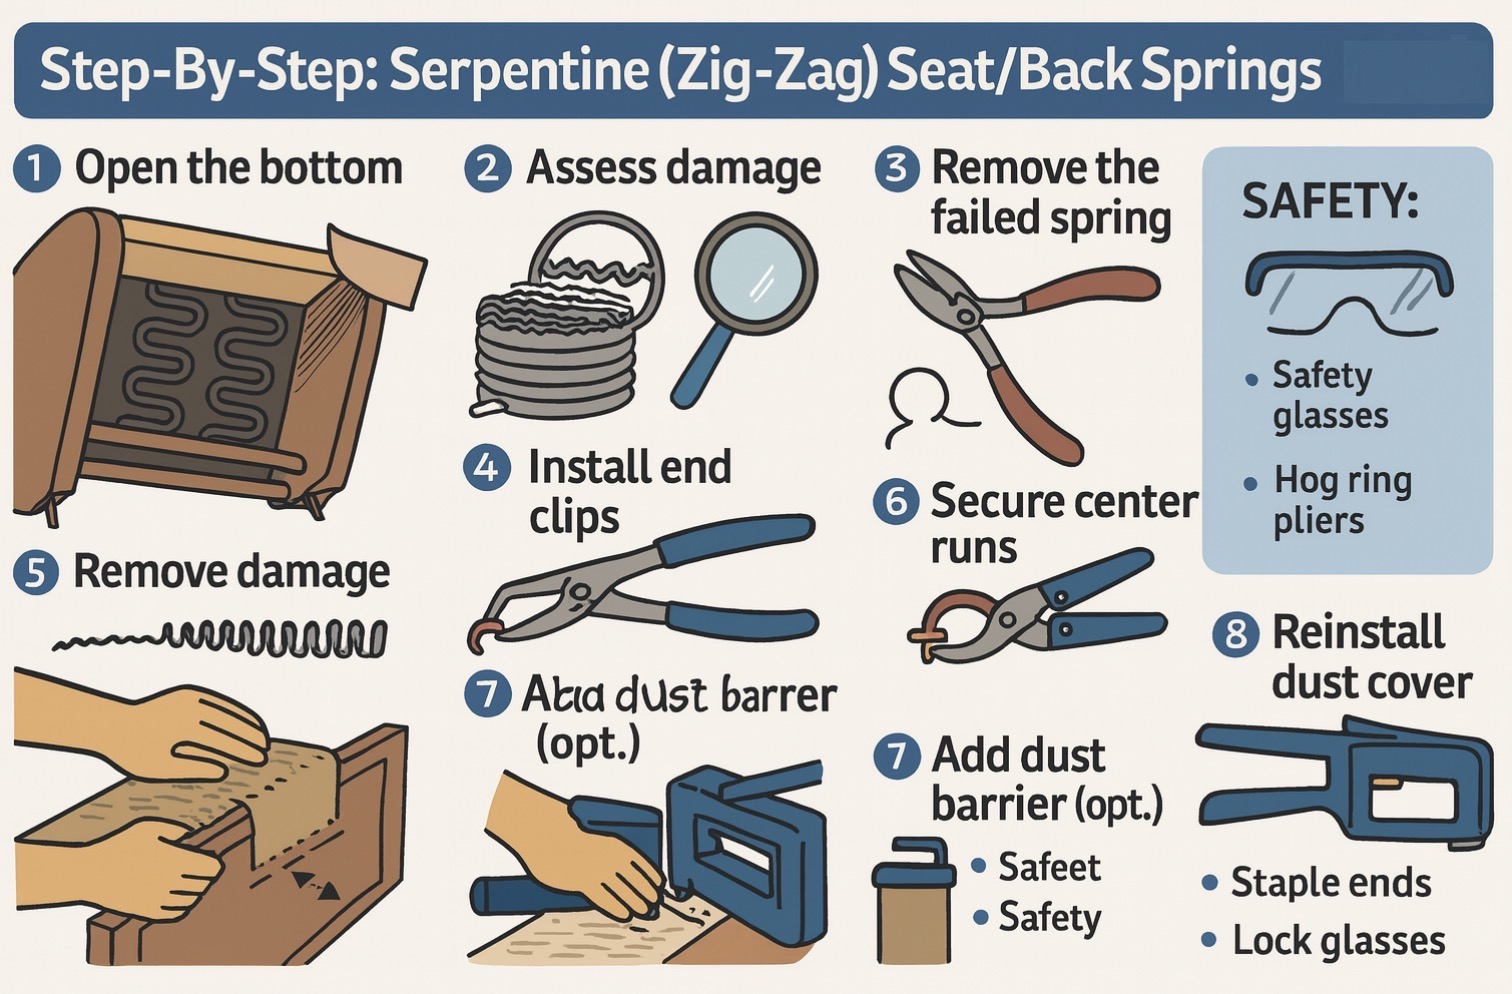
Step-By-Step: Replace Serpentine (Zig-Zag) Seat/Back Springs
- Open the bottom: Flip the chair. Remove dust cover staples to expose the seat deck.
- Assess damage: Look for broken serpentine wires, missing clips, or hog rings that tore through the border wire/webbing.
- Remove the failed spring: Pry off spring clips or cut hog rings with side cutters. Save intact clips for reference.
- Size the replacement: Match the length and pitch (number of “zigs”). Many kits can be cut to length; deburr ends.
- Install end clips: Attach new clips to the frame rails; seat the spring into clips with spring pliers.
- Secure center runs: Use hog rings to tie springs to border wire/webbing where the original did.
- Add dust barrier (optional): If the burlap/dust liner above the springs is torn, patch with upholstery burlap and staples.
- Reinstall dust cover: Staple fabric back. Flip the chair and test sit for even support.
Dialing Tension: Too Loose vs. Too Stiff
- Too loose (footrest drops/doesn’t hold): Use the next tighter spring (thicker wire or shorter free length), or move to a farther anchor hole to increase stretch.
- Too stiff (hard to close/open): Step down in wire gauge, choose a slightly longer spring, or move to a closer anchor hole.
- Footrest alignment off: Verify both sides use the same spring spec/hole position so forces are balanced.
When Springs Aren’t the Only Culprit
- Worn bushings/pivots: Excess play can mimic weak springs; inspect linkage rivets and pivot sleeves.
- Bent tabs or cracked frame holes: A spring will never feel “right” if the anchor geometry is damaged—straighten and reinforce if needed.
- Broken release cable: If the handle feels limp, the release cable may be the fix, not the spring.
Model & Brand Notes
- Lane/Catnapper/Ashley style mechanisms: Usually straightforward coil tension springs with obvious frame holes. Photograph before disassembly.
- Lift chairs (power): Assist comes from actuators; you may still have small return springs. Unplug and avoid pinch points.
- Euro recliners: Some use elastic webbing instead of serpentine wire—order elastic webbing kits, not wire springs.
Quick Parts & Tools (Amazon Search)
- Recliner tension/assist springs — primary replacement for weak/broken footrest and mechanism return springs.
- Serpentine (zig-zag) springs & clips — restore structural seat/back support to stop sag and lean.
- Upholstery spring pliers — controlled leverage for stretching/placing serpentine runs into frame clips.
- Hog-ring pliers & rings — fasteners that tie springs to border wire/webbing exactly like OEM methods.
- Upholstery stapler — reattach dust covers and burlap liners cleanly after repairs.
- Staple remover — lift old staples from dust covers without tearing fabric or gouging wood.
- Recliner pull handle & cable — fixes “no resistance” levers that mimic weak-spring symptoms.
- Silicone spray lubricant — non-staining lube for pivots after spring install to stop squeaks.
- Digital caliper — measure wire diameter/coil sizes to match spring strength accurately.
Troubleshooting After Replacement
- Squeak persists: Check the spring rubbing a sharp frame edge; dress with a file and add a nylon sleeve or light silicone.
- Footrest still won’t hold: Increase tension (different hole) or choose a spring with thicker wire/shorter free length.
- Chair leans left/right: Confirm both sides’ springs are identical and clips are seated in the same positions.
- Seat too firm after new serpentine: Add a thin foam topper between deck and cushion.
FAQ: Recliner Spring Fixes
Can I substitute a similar-looking spring?
You can if length, wire gauge, and hook style are close. Minor tension tweaks are possible with alternate frame holes, but big mismatches can damage the mechanism.
How many seat serpentine springs should a chair have?
Varies by width—often 4–6 runs. If one breaks, inspect and consider replacing adjacent runs and all end clips for even feel.
Is welding a broken spring OK?
No—heat weakens spring steel. Replace the spring.
What if the spring anchor hole is elongated/cracked?
Reinforce with a small steel repair plate or relocate the anchor to an equivalent hole; ensure geometry matches the opposite side.
Wrap-Up
With careful identification, accurate measurements, and the right tools, recliner spring repairs are straightforward and safe. Start by matching the spring specs (length, wire diameter, hook style), replace worn clips/hog rings, and fine-tune tension via anchor holes. A few test cycles and a dab of silicone on pivots usually restore smooth, like-new function—without replacing the entire chair.
Recliner Replacement Parts with Pull Handle and Release Cable (2-Sets), Repair Recliner Mechanism Parts Compatible with Most Furniture of Recliner Sofa Couch Chair
ttmagic Universal Heavy-Duty Metal Sofa Chair Recliner Release Pull Handle Replacement Parts, Fits Ashley, Lazy Boy and Most Recliner Brands, 3.5"L x 3"W x 1.2"H Handle Size

ttmagic Metal Recliner Handle Replacement Parts with Cable, Universal Recliner Sofa Chair Couch Release Lever Pull Handle, Fits Ashley and Major Recliner Brands, Exposed Cable Length 4.9“

KUANYUOO Universal Heavy-Duty Metal Pull Recliner Handle with Cable (Exposed Adjustable 4.7" to 5.2"), Fits Ashley and Other Manufacturer Brands Chair Release Handle for Sofa or Recliner

Baridwon 2 Set Recliner Replacement Parts, Durable Recliner Release Pull Handle with Recliner Pull Cable, Repair Replacement Parts Compatible with Most Furniture of Recliner Chair Sofa Couch